
Why Your Business Needs Professional Email in 2026
Using a free email address like sarah.bakery123@gmail.com might save money upfront, but it costs you credibility. When a potential customer sees a generic email address, they don't see a serious business. They see someone operating from their bedroom who might not be around next month.
Professional business email means using your own domain. Instead of relying on Gmail or Hotmail's branding, you get yourname@yourbusiness.com.au. This small change makes a big difference in how customers perceive your business.
A custom business email address does more than look professional. It gives you better security, spam protection, and integrates with business tools like calendars, video calls, and cloud storage. For small businesses in 2026, professional email is non-negotiable.
This guide walks you through everything you need to know. We'll cover choosing the right platform, setting up your email properly, and configuring DNS records so your emails actually reach customers instead of landing in spam folders.
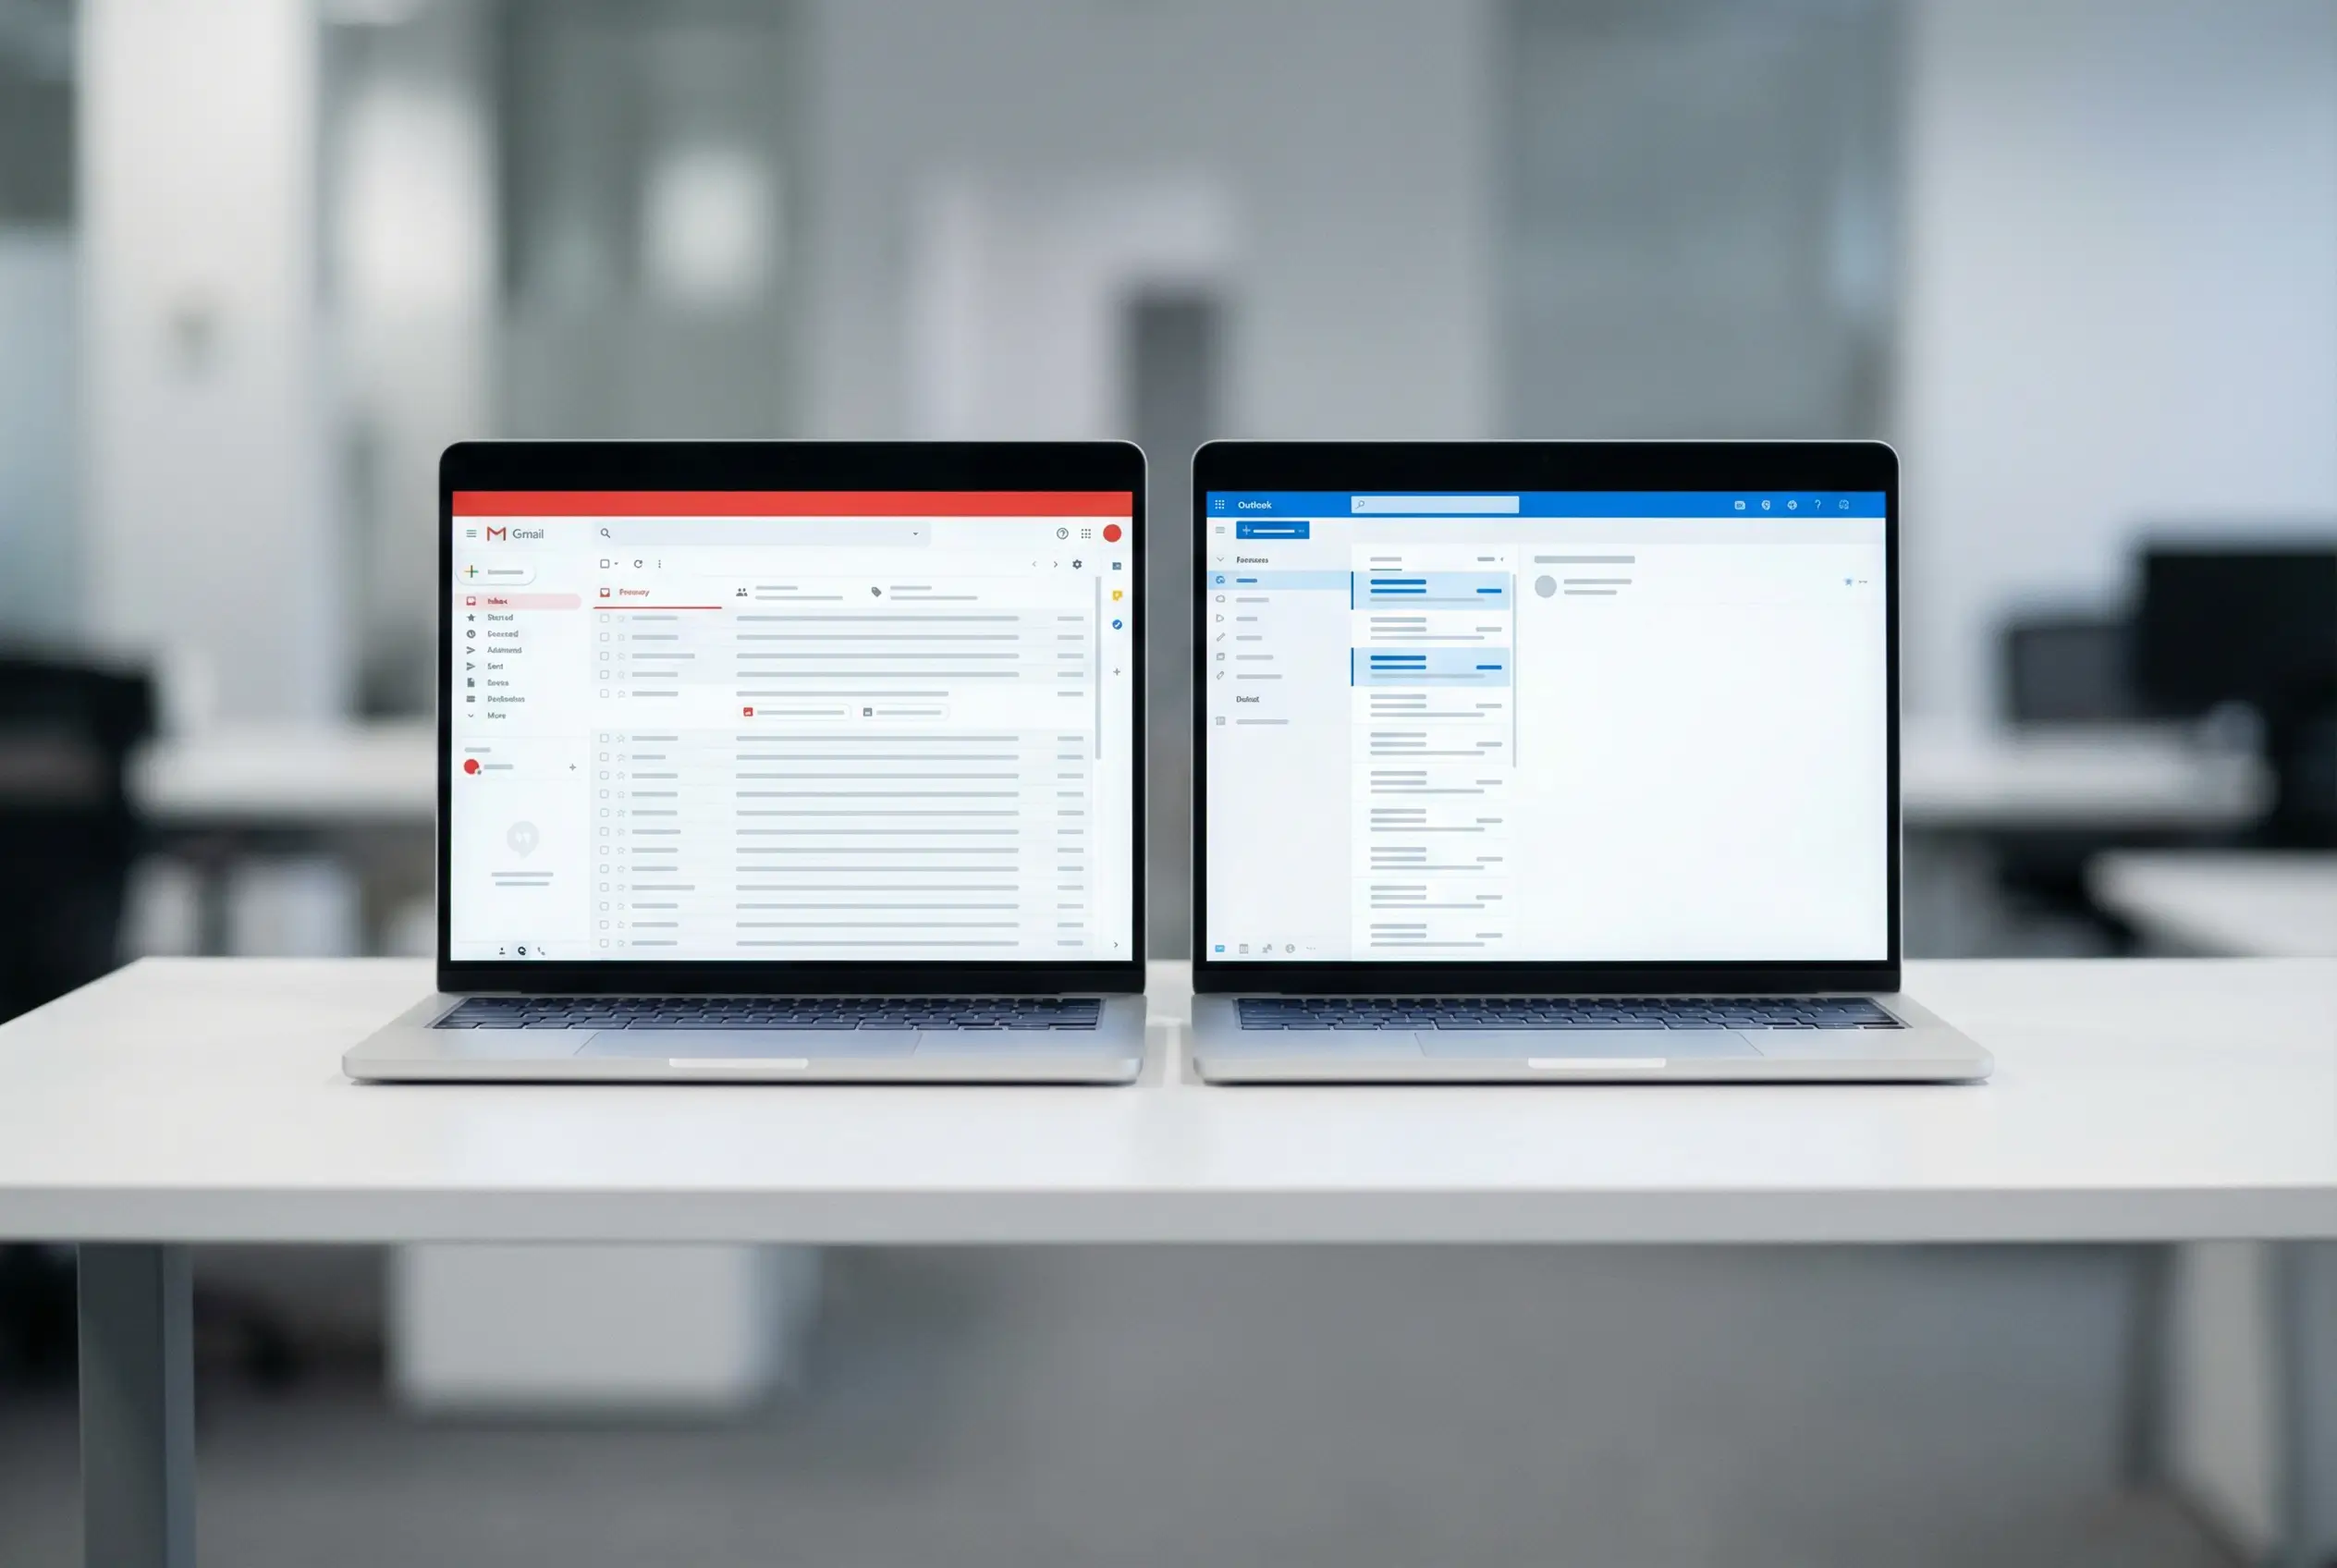
Gmail vs Outlook: Which Platform is Right for Your Business?
Choosing between Google Workspace and Microsoft 365 comes down to what tools you already use and how your team works.
Quick Comparison
What You Need Before You Start
Before setting up business email, you need a few things sorted:
1. A Custom Domain Name
Your domain is your business address online. It's the "yourbusiness.com.au" part of your email address. If you already have a website, you already own a domain. If not, you'll need to buy one.
Popular Australian domain registrars include:
- GoDaddy
- Ventraip
- Crazy Domains
- Netregistry
Domain names typically cost $15-30 per year for .com.au domains.
2. Access to DNS Settings
DNS (Domain Name System) is where you configure how your domain works. You'll need access to your domain's DNS settings to set up email properly. This is usually managed through your domain registrar's dashboard.
Don't worry if "DNS" sounds technical. Most registrars make this accessible through a simple control panel.
3. Budget for Email Hosting
Plan for $10-20 per user per month, depending on which plan you choose. A solo business owner needs one email address. A team of five needs five addresses. The costs add up, but professional email is a core business expense like insurance or accounting software.
4. Time to Set Up Properly
Initial setup takes 30-60 minutes. DNS changes can take a few hours to fully propagate (take effect), so don't expect instant results. Plan to do this when you have time to focus and aren't rushing between meetings.

Step-by-Step: Setting Up Google Workspace Email
Step 1: Sign Up for Google Workspace
- Go to workspace.google.com
- Click "Get Started"
- Enter your business name and choose how many employees you have
- Provide your name and current email address (you'll verify this later)
- Enter your domain name or purchase a new one through Google
Step 2: Verify Domain Ownership
Google needs to confirm you actually own the domain before letting you use it for email. You'll verify ownership by adding a TXT record to your domain's DNS.
- Sign in to your domain registrar (GoDaddy, Ventraip, etc.)
- Find the DNS settings or DNS management page
- Add a new TXT record with the verification code Google provides
- Wait 10-15 minutes, then click "Verify" in Google Workspace
This proves to Google that you control the domain.
Step 3: Create User Accounts
- In the Google Workspace admin console, go to Users
- Click "Add new user"
- Enter first name, last name, and choose the email address (e.g., sarah@yourbusiness.com.au)
- Set a temporary password
- Send login details to the user
Repeat this for each person in your team who needs an email address.
Step 4: Configure MX Records (Email Routing)
MX records tell the internet where to send emails for your domain. Without proper MX records, emails sent to your address won't reach you.
- Sign in to your domain registrar's DNS settings
- Delete any existing MX records (from old email providers)
- Add Google's MX records with these priorities:

Step 5: Set Up SPF Record (Prevent Email Spoofing)
SPF (Sender Policy Framework) tells email servers which servers are allowed to send email from your domain. This prevents spammers from pretending to be you.
- In your DNS settings, add a new TXT record
- Leave the hostname blank or enter "@"
- For the value, enter: v=spf1 include:_spf.google.com ~all
- Save the record
This tells receiving servers "only Google's servers can send email for this domain."
Step 6: Set Up DKIM Record (Email Authentication)
DKIM (DomainKeys Identified Mail) adds a digital signature to your emails that proves they actually came from your domain and weren't tampered with during delivery.
- In Google Workspace admin console, go to Apps → Google Workspace → Gmail → Authenticate email
- Click "Generate new record"
- Copy the DKIM record Google provides
- In your DNS settings, add a new TXT record
- For the hostname, enter the name Google provides (usually starts with "google._domainkey")
- For the value, paste the DKIM key Google gave you
- Save the record
- Back in Google Workspace, click "Start authentication"
DKIM records can take 24-48 hours to propagate fully.
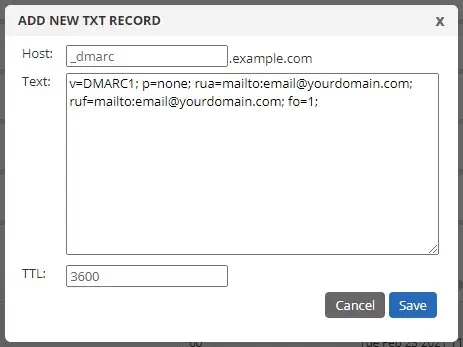
Step 7: Set Up DMARC Record (Email Security Policy)
DMARC (Domain-based Message Authentication, Reporting, and Conformance) tells email servers what to do if an email fails SPF or DKIM checks. It's your security policy for email.
- In your DNS settings, add a new TXT record
- For the hostname, enter: _dmarc
- For the value, enter: v=DMARC1; p=quarantine; rua=mailto:dmarc@yourbusiness.com.au
- Save the record
This policy tells servers to quarantine suspicious emails and send you reports about authentication failures.
What the DMARC values mean:
- v=DMARC1 - This is a DMARC record
- p=quarantine - Put suspicious emails in spam (you can also use p=reject to block them entirely)
- rua=mailto: - Where to send aggregate reports about email authentication
Start with p=quarantine while you test. Once you're confident everything works, you can change to p=reject for stronger protection.
Step 8: Test Your Email Setup
- Send a test email from your new business email to a personal email address
- Check that it arrives in the inbox (not spam)
- Send an email TO your business email and confirm you receive it
- Test on mobile devices to ensure everything syncs
If emails aren't arriving, double-check your MX records. If they're going to spam, review your SPF, DKIM, and DMARC setup.
Step-by-Step: Setting Up Microsoft 365 Email
Step 1: Sign Up for Microsoft 365
- Go to microsoft.com/microsoft-365/business
- Choose your plan (Business Basic, Standard, or Premium)
- Click "Buy now" or "Try free for one month"
- Create your Microsoft account or sign in
- Enter payment details
Step 2: Add and Verify Your Domain
- In the Microsoft 365 admin center, go to Settings → Domains
- Click "Add domain"
- Enter your domain name (e.g., yourbusiness.com.au)
- Choose your verification method (TXT record recommended)
- Sign in to your domain registrar
- Add the TXT verification record Microsoft provides
- Return to Microsoft 365 and click "Verify"
Microsoft confirms you own the domain before proceeding.
Step 3: Create User Mailboxes
- In the admin center, go to Users → Active users
- Click "Add a user"
- Enter first name, last name, and username
- Choose your domain from the dropdown
- Set a password (temporary)
- Assign a license (Microsoft 365 Business Basic, Standard, etc.)
- Click "Finish adding"
Each user gets their own email address and access to Microsoft 365 tools.
Step 4: Configure MX Records for Microsoft 365
- Sign in to your domain registrar's DNS management
- Delete existing MX records
- Add Microsoft's MX record:
Step 5: Set Up SPF Record
- In your DNS settings, add a new TXT record
- Leave hostname blank or enter "@"
- For the value, enter: v=spf1 include:spf.protection.outlook.com -all
- Save the record
This authorises Microsoft's servers to send email on behalf of your domain.
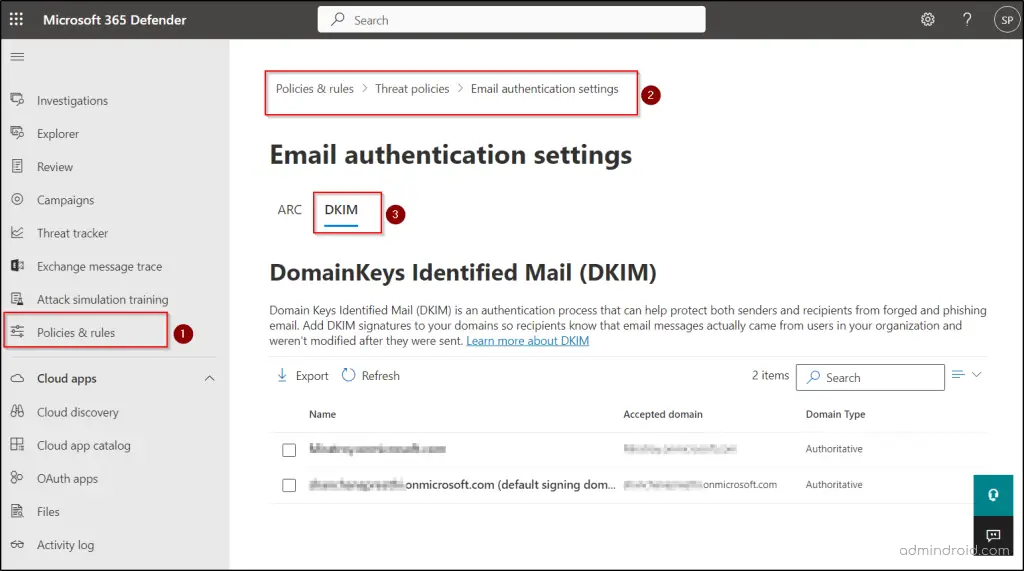
Step 6: Set Up DKIM for Microsoft 365
- In Microsoft 365 admin center, go to Settings → Domains
- Select your domain
- Click "DKIM" tab
- Click "Create DKIM keys"
- Copy the two CNAME records Microsoft provides
- Add both CNAME records to your DNS:
- First record: selector1._domainkey → points to Microsoft's value
- Second record: selector2._domainkey → points to Microsoft's value
- Save the records
- Return to Microsoft 365 and enable DKIM
Microsoft rotates between two DKIM keys for added security.
Step 7: Set Up DMARC Record
- In your DNS settings, add a new TXT record
- For hostname, enter: _dmarc
- For value, enter: v=DMARC1; p=quarantine; rua=mailto:dmarc@yourbusiness.com.au
- Save the record
Same as with Google Workspace, this sets your email authentication policy.
Step 8: Install Outlook and Configure Devices
- Users sign in to office.com with their new email address
- Download and install Outlook desktop app
- Outlook automatically configures with Microsoft 365 account
- On mobile devices, download Outlook app from App Store or Google Play
- Sign in with business email credentials
Everything syncs automatically across devices.

Avoiding the Spam Folder: Why DNS Records Matter
Setting up SPF, DKIM, and DMARC isn't optional in 2026. These records are the difference between your emails reaching customers and disappearing into spam folders.
What Happens Without Proper DNS Records
When you send an email without SPF, DKIM, and DMARC configured:
- Gmail and Outlook are more likely to mark it as spam
- Your emails might not deliver at all
- Spammers can easily impersonate your domain
- You have no protection against phishing attacks using your business name
- Your sender reputation suffers, making future emails even less likely to deliver
How These Records Protect You
Together, these create a security system that protects your business and ensures your emails actually reach people.
Checking Your DNS Records
After setting up DNS records, verify they're working:
- Use MXToolbox.com to check MX, SPF, DKIM, and DMARC records
- Send test emails to mail-tester.com to get a deliverability score
- Check Google's Postmaster Tools or Microsoft's SNDS for sender reputation
If something's misconfigured, these tools will tell you what needs fixing.
Common Mistakes to Avoid
1. Not Backing Up Old Emails First
Before switching email providers, export your old emails. Most platforms let you download everything as a backup. Don't assume the migration will be perfect or that you'll always have access to your old account.
2. Forgetting to Update Email Everywhere
Your email address appears on:
- Your website contact page
- Business cards
- Email signatures
- Social media profiles
- Google Business Profile
- Invoices and proposals
- Marketing materials
Create a checklist and update everything. Missing even one spot means customers might email the wrong address.
3. Skipping Two-Factor Authentication
Business email accounts are prime targets for hackers. Enable two-factor authentication (2FA) immediately. This requires a code from your phone in addition to your password when signing in.
Both Google Workspace and Microsoft 365 make 2FA easy to set up and significantly reduce the risk of account takeover.
4. Not Setting Up Email Forwarding from Old Addresses
Set up forwarding from your old email address to your new business email for at least 6-12 months. This catches emails from contacts who haven't updated their records yet.
5. Choosing the Wrong Plan for Your Needs
Don't pay for features you won't use. If you're a solo business owner who just needs email, the basic plans work fine. If you need advanced security or large amounts of storage, factor that into your budget from the start rather than upgrading later.
6. Ignoring DNS Propagation Time
DNS changes aren't instant. MX records typically propagate within 1-2 hours, but SPF, DKIM, and DMARC can take 24-48 hours. Don't panic if things don't work immediately. Wait at least 24 hours before troubleshooting.
After Setup: Getting the Most From Business Email
Set Up a Professional Email Signature
Your email signature should include:
- Your full name
- Job title
- Company name
- Phone number
- Website URL
- Business address (optional)
Keep it simple. Avoid large images or too much formatting. Both Gmail and Outlook have built-in signature tools that make this easy.
Organize with Labels or Folders
Create folders or labels for:
- Clients (one per major client if needed)
- Projects
- Invoices
- Suppliers
- Important documents
Good organisation makes it easier to find emails later and keeps your inbox manageable.
Use Calendar Integration
Both Google Workspace and Microsoft 365 integrate email and calendar. When someone emails you about a meeting, you can add it to your calendar with one click. Use this to stay organised and avoid double-booking.
Enable Spam and Phishing Protection
Both platforms have built-in protection, but you can strengthen it:
- Report spam emails to train the filters
- Enable advanced phishing protection (available in higher-tier plans)
- Review blocked emails occasionally to catch false positives
Train Your Team on Security
If you have employees:
- Teach them to recognise phishing emails
- Require strong passwords (at least 12 characters)
- Enable 2FA on all accounts
- Create a policy for handling sensitive information via email
Set Up Auto-Replies for Holidays
When you're away, set up an out-of-office auto-reply:
- State when you're unavailable
- Provide an alternative contact if urgent
- Mention when you'll respond to emails
This manages expectations and looks professional.
When to Get Help With Setup
Most small businesses can set up email themselves by following this guide. That said, some situations warrant getting professional help:
- You have a complex existing email setup with multiple domains
- You're migrating hundreds or thousands of emails from an old system
- Your business has specific security or compliance requirements
- You don't have time to troubleshoot DNS issues
- You need integration with other business systems
Professional setup typically costs $200-500 for small businesses, but saves hours of frustration and ensures everything's configured properly from day one.
Professional Email is Non-Negotiable in 2026
Every legitimate business needs professional email. It's not optional anymore. Customers expect it. Partners expect it. Suppliers expect it.
Setting up business email takes an hour or two of focused work, but the benefits last for years. You get credibility, better security, and tools that help you run your business more effectively.
Whether you choose Google Workspace or Microsoft 365, both are solid platforms that work well for Australian small businesses. Pick the one that fits your workflow, follow the setup steps carefully, and don't skip the DNS records. Those SPF, DKIM, and DMARC configurations are what keep you out of spam folders.
If you're launching a business or upgrading from free email, now's the time to make the switch. Your professional image depends on it.
Ready to Set Up Your Business Email Properly?
Professional email is just one piece of building a credible business presence online. At Xpert Start, we help Australian small businesses set up everything they need to succeed online, from business email and web design to SEO services and complete branding packages.
If you'd rather have experts handle your email setup, DNS configuration, and domain management, we can take care of it. We'll make sure your emails reach customers, your domain is secure, and everything works properly from day one.
Contact our team to discuss business email setup, or explore our business packages for comprehensive digital solutions that cover email, websites, branding, and marketing.

